How to Choose Banded Glass Walls for Your Project?
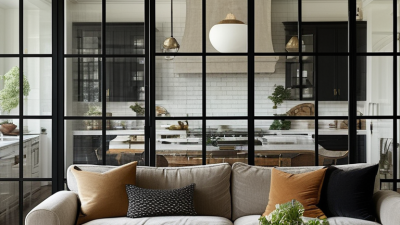
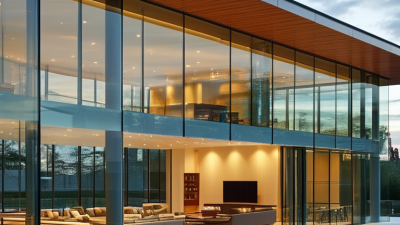
Choosing Banded Glass Walls requires more than selecting an attractive horizontal pattern. The system must support privacy, daylight, acoustics, safety, and the building’s visual identity. Banded glass may use ceramic frit, colored interlayers, acid-etched surfaces, or opaque spandrel panels. Each option changes appearance, heat gain, cleaning needs, and long-term performance.
Ludwig Mies van der Rohe’s famous principle, “Less is more,” remains useful when reviewing glass wall design. However, less visual detail does not always mean less technical complexity. A narrow band can conceal floor edges, mechanical zones, or workspace activity, but its position must match the structure behind it. Designers should study glare near desks, reflections beside corridors, and sightlines across meeting rooms. A full-scale sample helps.
Small details matter.
Check the specified glass thickness, acoustic rating, fire performance, and edge treatment. Confirm whether the system meets applicable local building requirements. Thermal modeling can reveal uncomfortable solar exposure before installation. Acoustic testing may prevent expensive changes after occupancy. Maintenance teams should also review fingerprints, dust lines, and access to concealed frames.
In real project reviews, a polished rendering can hide practical weaknesses. The bands may look balanced on screen but feel visually heavy at eye level. Or the selected finish may be difficult to replace. Budget pressure also encourages compromises, sometimes too early. Therefore, compare samples under daylight and artificial lighting, then document the decision. The best Banded Glass Walls combine disciplined detailing with honest reflection about how people will use the space.
Project Requirements and Functional Goals
How to Choose Banded Glass Walls for Your Project?
Project Requirements and Functional Goals
Begin with the room’s real purpose, not its appearance. A meeting room needs visual connection, acoustic control, and comfortable privacy. A corridor may only need daylight and directional clarity. List these goals before comparing glass layouts.
Measure ceiling height, wall length, door positions, and nearby furniture. Small errors can affect alignment. I once saw a banded pattern interrupted by a light switch, which weakened the entire design. Review elevations early. Mark power outlets, vents, screens, and signage on the drawing.
Choose band height according to daily movement and sightlines. A lower band can protect privacy near desks. A higher band can separate spaces without making them feel closed. Consider frosted, translucent, or clear sections based on the room’s activities. Acoustic needs also matter. Thin glass may look elegant but perform poorly beside noisy work areas. Ask for tested acoustic ratings, not vague promises.
Safety and maintenance should guide the specification. Confirm glass type, edge protection, door hardware, and local building requirements with qualified professionals. Check how cleaning teams will reach the upper panels. Fingerprints collect quickly around entrances. That detail is easy to miss.
Do not copy a pattern from another project without testing it. Request a full-size sample or a realistic digital elevation. View it in morning and evening light. Reconsider the design if the bands feel distracting, confusing, or too private. A technically correct wall can still fail its users.
Glass Types, Bands, Frames, and Privacy Options
How to Choose Banded Glass Walls for Your Project?
Banded glass walls combine transparency with controlled privacy. Start by identifying each room’s purpose, daylight needs, and sound expectations. Clear tempered glass suits collaborative areas and corridors. Laminated glass can improve sound control and retain fragments after breakage. Frosted or textured glass softens views without making a room feel closed. Measure twice. Small errors affect panel alignment and door operation.
Bands add visual structure and help occupants recognize the glass surface. They may be printed, frosted, colored, or formed with applied film. Use stronger contrast near entrances, corners, and busy walking routes. A low band can hide desks and equipment, while a higher band protects meeting privacy. Avoid placing bands where they block useful daylight. It sounds obvious, but many layouts treat every room alike.
Frames influence both appearance and performance. Slim aluminum frames create a lighter look, while deeper profiles can support larger panels and improve acoustic detailing. Check wall conditions before selecting a frame system. Uneven floors can create difficult gaps. Privacy should be layered, not assumed. Combine translucent bands with blinds, curtains, or switchable glazing when conversations are sensitive. Review fire, safety, accessibility, and acoustic requirements with qualified professionals and local authorities. One compromise may remain: maximum openness rarely delivers maximum privacy.
Layout Planning, Measurements, and Installation Conditions
How to Choose Banded Glass Walls for Your Project?
Layout planning should begin with movement, privacy, and sightlines. Mark desks, doors, walkways, and fixed equipment before choosing panel widths. Banded glass walls work well when visual openness meets practical privacy. Place bands at natural eye level, but confirm the users’ average height. A small drawing can reveal large problems. I once saw a layout where a door swing blocked a main walkway. The glass looked attractive, but daily movement became awkward.
Measure the finished opening, not the rough construction area. Record wall-to-wall width, floor-to-ceiling height, and nearby uneven surfaces. Check several points because floors and ceilings are rarely perfectly level. Allow space for tracks, seals, frames, and adjustment. Confirm the glass thickness and band position with the installer before ordering. Incorrect measurements are expensive to correct. They also create visible gaps and alignment issues.
Tips: Use a laser measure and write down every reading. Photograph corners, outlets, sprinklers, and ceiling joints. Keep a small tolerance for site adjustment, based on the installation system. The substrate must be sound, clean, and dry. Installation may fail when flooring is unfinished or ceiling services remain exposed. Check access routes for long panels and protect glass during handling. Do not assume the approved drawing matches the site. A final site inspection is still necessary. Sometimes, the “perfect” plan needs revision. That is not failure; it is responsible project control.
How to Choose Banded Glass Walls for Your Project?
Layout Planning, Measurements, and Installation Conditions
Planning guide: This example uses common interior glazing dimensions: a 7,200 mm wall length, 2,700 mm finished height, 1,200 mm glass module width, and a 300 mm visual band. Confirm the actual opening, floor and ceiling levels, structural movement, glass thickness, and installation tolerances before fabrication.
Budget, Maintenance, and Supplier Selection Criteria
How to Choose Banded Glass Walls for Your Project?
Budget should be assessed beyond the glass panel price. Include framing, delivery, installation, access equipment, and future repairs. A low quotation may exclude floor protection or on-site adjustments. Ask for a detailed, itemized proposal.
The band design affects privacy, cleaning, and visual comfort. Frosted or ceramic bands can hide fingerprints near door handles. They may also reduce daylight if placed too densely. Request a full-size sample beside your actual flooring and lighting. Small samples can mislead. For safety, confirm the specified glass type, thickness, edge treatment, and tested performance with a qualified professional. In busy offices, laminated glass may offer useful impact protection and improved acoustic control, depending on the complete wall system.
Maintenance planning is often overlooked. Check whether the finish tolerates routine cleaning without streaks or discoloration. Ask how damaged sections are replaced. Matching an older band pattern can be difficult. Supplier selection needs evidence, not polished promises. Review installation experience, measurement procedures, quality records, warranty terms, and response times. The supplier should explain tolerances, hardware compatibility, and expected lead times clearly. Insist on a site survey before final pricing. I have seen projects suffer because drawings ignored uneven floors. That mistake was preventable. Still, not every risk can be removed. Leave a realistic allowance for concealed conditions and minor redesigns. Request references for comparable wall sizes, not merely attractive photographs.